I was a winner!!!!! The lovely Ellie at X JELLYJAM X had a Christmassy giveaway, and I won!!!!!! Am feeling super smug with my new stocking ( for the Q ) and keep admiring it from afar........soooo beautiful, and well made......THANKYOU JELLY JAM!!!!!!!! Pop over and see her other bits, as she uses the most fantastic vintage fabrics.
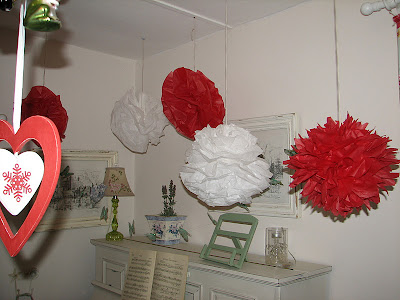
This year, it's all about a D.I.Y Christmas for me. I also like the girls to get involved with decorations and wot not. I thought you might like to see how the tissue paper pom pom decorations we made last week work. ( we also made them for little bumblebee's birthday party....so very useful! )
You just need lots of sheets of tissue paper some garden wire, scissors and string.
We found around 10 sheets of tissue paper worked best to create a full pom pom.
Place 10 sheets of your desired colour on top of one another.
tissue bow is stage 4.......
big bumblebee nearly at the end of her folding.
1. You are working along the longest length of the paper. At one end, start folding a strip about 2 inches, then turn over and repeat on the other side, and so on and so on until you come to the end of the sheets. ( try to be as precise as you can, however if children are having a go, don't be too hard on them!!! Just let them go with it....)
You should end up with a fat strip of folded tissue paper concertina styleeeee.
Make sense so far??????
2. Now wind a length of garden wire around the middle of your strip. ( find this by folding in half ). Keep it tight, as this holds it all together.
3. Then attach your desired length of string to the wire.
If you want, now is the time to shape the ends of the strips, I quite like them plain, but you could zig-zag, waves them if you wanted too.
I found hanging the pom pom up at this point helps with the shaping.
You are nearly there!
4. Fan out both sides of the soon to be pom pom. Start on one side by GENTLY pulling apart the sheets of paper, working from one end to the other....and so on and so on.......
Until you end up with a nearly pom pom....all you do is fiddle and titivate the sheets into looking like they don't part in the middle, like they are continuous layers......
That is your pompom Done! Ready to make more?!!!!
I think there are tutorials on the web about these, where people measure their strips, use craft knives and it is all very exact and precise....I couldn't be bothered with all that!
Happy pom-pomming!!!
xx


Aw thanks Nattie! How surprised was I when one of my own stockings popped up on my dashboard? Glad you like it and most importantly hope Q does too.
ReplyDeleteThanks for the pompom tutorial. Have large quantity of white tissue paper so might have to have a go at that after we break up.
Ellie
x